tagline

One woman's adventures in cooking for her Dutch-American family.


Showing posts with label bread. Show all posts

Thursday, September 8, 2011

Quick & Crusty French Baguettes

Quick and Crusty French Baguettes
We started off the year this year in Europe vising The Hub's family. We took a day trip to Paris (where we were engaged 4.5 years ago!). We stopped a local grocery store for breakfast one morning and bought a huge baguette for about 75 euros (a little less than a dollar). I realize that a grocery store isn't as romantic as a bakery, but we were walking, hungry, with a toddler and the grocery store was the first food establishment we found! A few weeks later, back at home, we found a baguette at our local grocery store for almost $3. Ever since then, I have wanted to make my own.

Thanks to Pinterest, I found this really easy (only slightly modified) recipe, originally posted on Babble.com.

Ingredients:
• 2 cups very warm water
• 1 packet yeast (2 1/4 tsp)
• 2 tablespoons sugar
• 1 1/2 teaspoon salt
• 3-4 cups flour

Instructions:
1. Preheat the oven to 425 degrees.
2. In a large bowl, whisk together the warm water, yeast, and sugar. Yeast can be a little tricky. Here's my secret:
I am guilty of killing many a yeast particle...until I learned to use water that was exactly 95 degrees.
3. Set the bowl on top of your preheating oven for ten minutes.
The heat from the stove will help activate the yeast.
Your yeast should look nice and frothy, like this. If you still see cloudy water, give it another 5 minutes. If it doesn't look like this, you've killed the yeast and need to try again.
4. Stir in the salt and add the flour a half-cup at a time, until the dough becomes soft but not sticky. Knead the dough until elastic. Texture is more important that measurements because the amount of flour you need will be based on the humidity and altitude of your home.
While I aspire to owning a Kitchen Aid mixer, for now I do everything by hand. Keep adding flour until you can knead the dough without it sticking to your fingers.
5. Cut the dough into four even pieces.

6. Roll each of them into four long, thin ropes.
Clearly I need more practice with play dough.
7. Twist together two of the ropes to form one loaf. Twist the other two ropes together to form a second loaf.

Close up of the part of my twist that looks impressive.
8. Transfer both onto a large baking sheet lined with parchment paper.
As I rolled my dough, I ended up having to make a third twist because of the size of my oven sheet.
6. You can now bake the loaf right away (if you’re in a hurry) or allow it to rise for an additional 15-30 minutes on top of your warm oven.
This is only 15 minutes of rising.
7. Now for the other secret: Place 3-4 cups of ice on a cookie sheet. Open your hot oven and place the baking sheet with the baguettes on the top rack, then place the tray with the ice cubes on the bottom rack of the oven and quickly shut the door. Do NOT open your oven for 15 minutes. Bake until golden brown, about 15-18 minutes.

Be careful removing the water tray when you're done!
8. Serve fresh and hot with your favorite olive oil for dipping.

Eet Smakelijk! Or, in this case, bon appetit!

Thursday, February 3, 2011

Banana Bread

Part of our food goals around here includes an effort to reduce the amount of food we waste. I remember reading an article about the amount of food Americans waste and it was pretty shocking...and especially sad when you think of all the people in the world who are hungry. So, we were convicted about that.

Meal-planning has helped us greatly in this goal. For the most part, we only buy what we need for the meals we plan to make. After shopping this way for over a year, it's hard to imagine shopping without this list! We do buy the occasional snack food (licorice allsorts and Breyer's ice cream), but somehow they manage to disappear before spoiling. I've started going through the kitchen each week and if there is any leftover fruit or vegetable that I don't have plans for, I'll often chop it up and freeze it for a future soup or something. My boys love all things dairy, so milk, dairy and cheese never has a chance to spoil.

So that leaves bananas. We don't buy them every week, but we do buy them often. I've been freezing them so we have a good stash for when the craving for banana bread strikes. It struck last night!

I have several banana bread recipes: with chocolate chips, with chai tea, with walnuts. I found this one last night, and the piqued my interest. And I found a new blog to follow. (My name is Jen...and I'm addicted to food blogs).

Banana bread really can't turn out badly, and this one is no exception. It's super moist and the taste is still pretty mild, so I would increase the spices. And we were drooling, so we took it out a little early. Next time, I'll keep it in for the full 50 minutes. (I think we did 45). Also, I added chopped pecans to the batter and another handful on top.

Banana Bread

makes 1 loaf, prep 10 minutes, cook 50 minutes

Ingredients:
  • 1 stick (1/2 cup) of butter (I use unsalted)
  • 1 cup sugar
  • 2 eggs
  • 1 1/2 cup flour
  • 1/2 tsp salt (increase this to 1 tsp is using unsalted butter)
  • pinch cloves
  • 1/2 tsp mace or nutmeg
  • 1/2 tsp cinnamon
  • 1 tsp baking soda
  • 1/2 cup buttermilk
  • 1 cup mashed banana (about 2-3 bananas)
  • (1/2 cup chopped nuts, pecans or walnuts, optional)
Instructions:
  • Preheat oven to 350°F and grease a loaf pan.
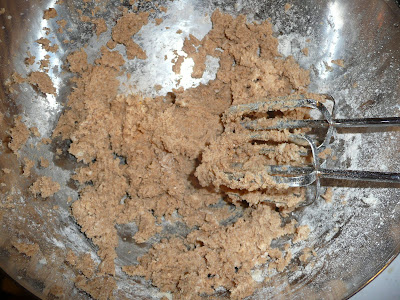
  • Cream the butter and sugar.
  • Add eggs, flour, salt, and spices, stir to combine.
  • Combine baking soda and buttermilk in a measure cup, stir well then add to batter. Beat until well combined.
The sad, neglected bananas that inspired today's adventure.
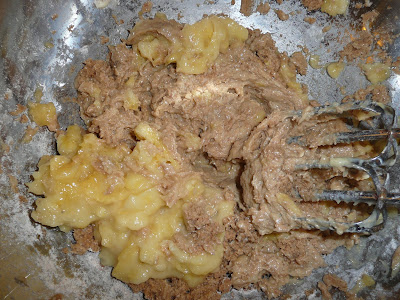
  • Stir in mashed banana and nuts if using.
  • Pour batter into prepared loaf pan and bake approximately 50 minutes or until a tester in the center comes out clean.
This is about the time I realized that I forgot to spray the pan. It only stuck a little bit.

Wednesday, February 2, 2011

Cinnamon Raisin Bread

I'm having a lot of fun following Beth at BudgetBytes. Great food and saving money, these are two of my favorite things!

A friend of mine asked me today if I used the bread machine we received as a wedding gift. Actually, I don't. The usual answer for this is that people don't make their own bread. I don't use it for two reasons:

1) My hubs eats a LOT of bread. Seriously. He calls his sandwiches his "tower of power." It's nothing for him to down three or four sandwiches---that's six-eight slices of bread!--at a sitting. The bread maker we have makes these cute little square loaves...which disappear awfully fast. So I started making bread in loaves that last a little bit longer, and double the recipe when I'm feeling especially ambitious.

2) It's about 20 years too late, but I'm really interested in the chemistry of cooking. I like breaking things down to their whole food element to see how they combine and interact together. Yeast in particular has been vexing to me, but I think I found the sweet spot at 95 degrees F.

Usually, when I make bread, I make wheat bread. I've also made garlic, multigrain and dill. I'll continue to play with seasoning and flavors. The hubs really likes cinnamon raisin. I made it once, but it was just okay. Then I found this recipe and was blown away. It is that good. The only downside is that it takes quite a while to make--mostly rising time. Since I get to stay home during the day, it's not a problem. Plus, it makes the house smell all cinnamony and wonderful.

by Beth at BudgetBytes (click the link above for the cost breakdown and her commentary)

Prep time: 15 min.
Cook time: 30 min.
Rise time: 3.5 hrs
Total: 4 hrs 15 min.

Ingredients:
  • 1 cup whole wheat flour
  • 2.25 cups bread flour
  • 2 Tbsp brown sugar
  • 1.25 tsp salt
  • .75 Tbsp yeast
  • 1/2 cup raisins
  • 1 Tbsp cinnamon
  • 1.25 cups warm water
Instructions:
  • In a large pot or bowl, combine the flours, brown sugar, salt, yeast and raisins.
  • Stir everything until evenly mixed (break up any raisin clumps).
  • Add the warm water and stir. If the dough does not come into one cohesive ball (with no dry bits left at the bottom of the bowl) add a little more water, one tablespoon at a time, until it all comes together.
This is my secret to not killing the yeast.
  • Loosely cover the bowl and let it rest for 2 hours at room temperature. (Jen says: I'm not sure why the dough is supposed to be covered and I've read that the towel should be wet, dry, hot and cold. I usually use a warm, wet cloth.)
  • After two hours the dough will have risen and grown to about twice the size. It will be a rough looking, shaggy ball of dough.
  • Turn it out onto a floured surface. Give it maybe one or two turns or "kneads" in the flour just to work in enough flour to keep it from sticking to your hands. Flatten and stretch the dough into a long rectangle. The short side of the rectangle should be the same length as your bread pan, the long side double that.
My son was very disappointed that we didn't have to use the roller.
  • Sprinkle the cinnamon over the surface of the rectangle. If you want a sweeter bread, you can sprinkle on some additional brown sugar with the cinnamon.
  • Roll the rectangle up and place it in a bread pan coated with non-stick spray.
Your roll should be as wide as your loaf pan, and twice as long.

  • Let the bread rise for 1.5 hours or until it has risen up and out of the pan.
Oops...I guess I didn't roll evenly!
  • Preheat your oven to 425 degrees.
  • Brush the top of the bread with water and bake for approximately 30 minutes or until the top is a deep golden brown.
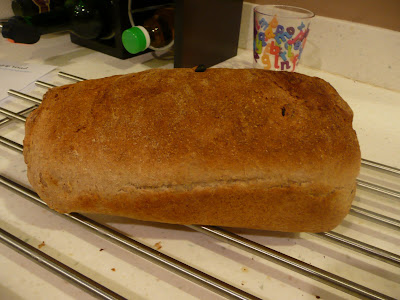
  • After baking, turn it out of the bread pan onto a wire cooling rack. Let cool completely before slicing.
A few helpful hints from Beth:
  • When you roll the dough up, stretch as you roll... the more it's rolled, the more swirl you'll have.
  • I sprayed the top of the loaf lightly with non-stick spray before letting it rise so that the top would stay pliable and allow it to expand.
  • A few chopped nuts would also be AH-MAZ-ING in there... mix them in with the dry ingredients in the beginning.
Related Posts Plugin for WordPress, Blogger...